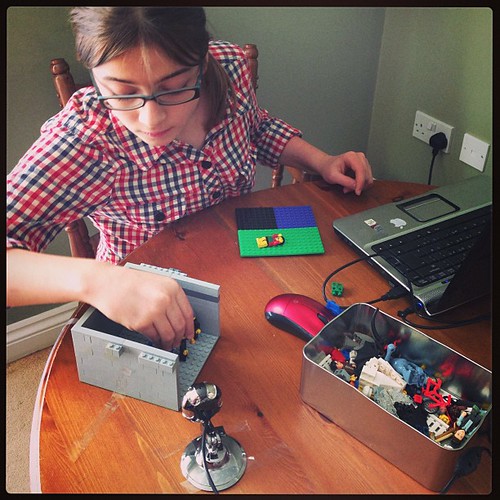
You may remember that Maddy loves to model and animate. A while back she created her first Lego animation using my iphone and windows movie maker. That prompted us to buy her a camera and small tripod but she’s a bit of a perfectionist and could never get it as accurate as she wanted it to be. Then she saw an animation pack she quite liked at a friends and was desperate for something similar. SO when ZU3D asked us try out their pack, which includes webcam, software which editing and tutorials, plasticine, a jungle scene and a green screen, I had a feeling she was going to love it. Read on to hear what Maddy thought as this is her review.
What Maddy Did – dictated by Maddy herself.
When I first got the software set up, I thought it looked so easy to use that I wouldn’t need to use the tutorial videos so I made a smurf video. It’s a smurf rock band performing. I didn’t know how to use the green screen because I hadn’t watched the tutorials so I just used it as a background. The models are plastic models. It was easy to work out how to take the pictures and I moved each model a bit at a time. I hadn’t done the sound tutorial so I didn’t add music. After I had done this one I wanted to use the tutorials to find out how to do the things I didn’t know how to do.
So I watched the green screen tutorial and decided to make the pokemon plasticine video; this was an idea from something I did with a cousin a while back. With this software you can use any cloth as a background in any colour; this was a good thing because my model had some of the bright green colour in it and it would have made part of it disappear! Once you’ve shot the screen you can edit the ‘green screen’ and rub out some of the effect. You can even rub some of your disappeared picture back in! Then you can add any background you want.
With the green Pokemon I reused quite a few frames; this is really easy to do in the software. With this software if you break or knock over your model you can use a ghost of the previous frame so you can get everything back into the right place.This was easy to do. I had to use something to hold up the red Pokemon on his hind legs but I could rub that out afterwards. I also edited a leg back in, using a lump of plasticine as one of his legs didn’t show up right!
On to the Lego animation. I came up with the idea for this after watching the sound recording tutorial and after watching a couple of other videos. Previous movies have been hard to keep still and get the lighting right but the camera in this pack makes it easy to keep things still and the lighting works really well. The ghosting helps lots but I also stuck everything, including the camera, down with sellotape. There are several hundred frames in the film and it was much quicker and more effective than anything I have done before. You can overlap sounds and record into the software and I did my own sound effects with thew piano and recorded all the voices.
Also, my actual Lego room was very small, but I made it look much bigger by moving the camera angle around!
Maddy gives the ZU3D 9/10 and it’s only not 10/10 because she hasn’t done all the tutorials yet. There is loads to learn, the tutorials are really clear and inspired her lots. We are really grateful to them and I think a new career is on it’s way! We think the ZU3D (that’s an affiliate link) is well worth the £59.99 but you know, don’t buy it through the affiliate link unless you have to, go direct to their own shop and save them the 3rd party fees and the country the corporation tax 😉
Disclosure: we were sent this software free for review but opinions are our own. Maddy, who is 12, used the software and hardware entirely on her own and my help was confined only to helping her activate the external webcam on the computer. The words above are her dictated own, typed by me and with a bit of editing for written word help.

I’m really impressed! Well done Maddy!